How To Coach: Pitching #2

Medium
How to Coach: Pitching #2 is the second drill in Dugout Captain’s series to teach Pitching as a skill. Use with your team to coach-up multiple players, or follow as a coaching roadmap in training your own athlete. Developed by working with thousands of young pitchers, this series follows a proprietary coaching path: #1 – Balance –> #3 Finish –> #2 Power.
EXECUTION – This drill first reviews the fundamentals covered during H-T-C-Pitching #1: The Stretch Stance and Position #1 – Balance. Then, instruction moves to the end of the delivery and Position #3 – Finish. The coaching goal of this lesson is to provide the athlete with two anchor points of strength and balance during the delivery: Position #1 – Balance and Position #3 – Finish.
DC believes that if a pitcher can get to the balance point under control, reach back and aggressively let it rip, and then control the finish position… they have a great chance of throwing strikes. Moving into the third lesson, coach and athlete can then work on Position #2 – Power, where the concept of building and producing power is covered. This, in turn, leads instruction to more detailed areas like the glove arm, head, throwing arm action, etc. Remember: #1 – Balance –> #3 Finish –> #2 Power.
I. REVIEW – DRY WORK – Begin first by ‘getting hot.’ Whether individually playing catch and then pitching several fastballs, or firing at throw nets as a group, get loose first. Next, walk back to the athlete and review the fundamentals learned during Part #1 without a baseball. This is called “dry work” and provides the perfect opportunity to ask if the athlete did his homework since the previous lesson!! Without a baseball, work through both the Stretch Stance and Balance Point together.
- Stretch Stance – Coming set while in the stretch position, use keywords: Feet, Hands, Eyes
- Position #1 / Balance – The balance point, or leg lift, uses keywords: Knee Up, Foot Out, Toe Down
II. REVIEW – FREEZE #1
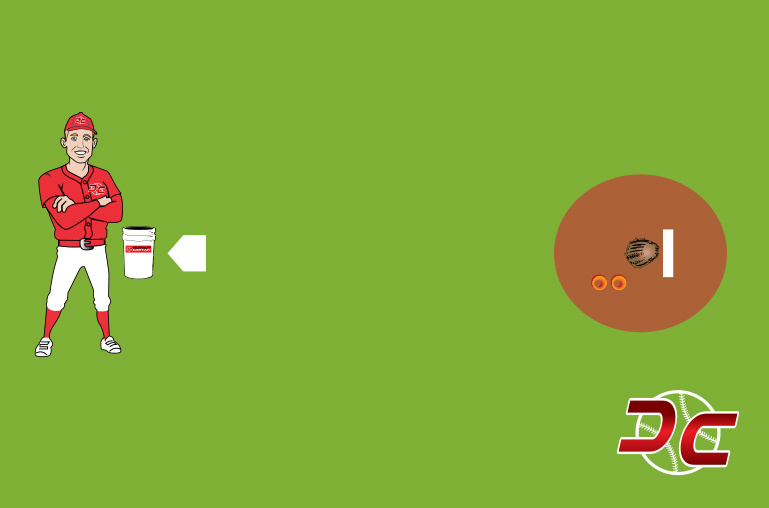
Throw 6-8 fastball repetitions with a freeze at the balance point (Coach-Lead). While sitting on a bucket and the glove faced down, first guide the athlete into a solid stretch stance position (“check feet, check hands, check eyes”). Then, use the verbal “up” as a cue for the athlete to take a leg lift. Holding for three seconds, make any necessary adjustments to the knee (up), foot (out), or two (down)… or to the posture (tall) or tempo (smooth lift). Then, flash the glove so that the pocket faces the pitcher as a cue for the athlete to fire! Ignore the finish as that is coming next, but ensure that this athlete can execute both Stance and Balance correctly and is thus ready to accept more instruction. Throw another 3-5 pitches with no stopping or freezing (Athlete-Lead) and then it’s time to move focus onto the Finish.
III. TEACH POSITION #3 – FINISH
When moving onto the fundamentals of a proper finish, do it with a surprise, and teach finish position fundamentals at the end of a pitch: “On this next pitch, I want you to use your proper leg lift and let it rip… and then hold your finish. Wherever you are, just freeze.”
With the athlete holding his position at follow through, adjust (and teach) the step-by-step fundamentals of the finish position using the following keywords. Keep in mind, this is for the right-handed pitcher:
- Point (left foot) – Left foot stays wherever it is, but twists so that the foot points directly to home plate.
- Click (right foot) – Right foot moves (typically backwards) to a location straight across from the left-foot big toe. The right leg’s knee should be turned in, with the foot up on the toes. Shift that right foot up onto the toe so the majority of body weight is centered over the left foot.
- Shield (glove) – The glove should be positioned in front of the chest. Above belt, in front of chest, with a little separation or space between chest and glove.
- Sword (arm) – The throwing arm follows through to a hanging position in front of, or slightly across, the left knee. Right (throwing) shoulder over left knee.
IV. FREEZE #3
FREEZE @ #1 & #3 – Throw 6-8 fastballs while incorporating a freeze at the balance position AND a freeze at the finish position (verbal: Freeze-1&3). This allows for additional reps working together on the balance point first, but then a primary focus on adjusting to the perfect finish after each pitch. The finish can be difficult, so be sure that the athlete does NOT slow down in an attempt to execute a proper finish. Every baseball must thrown with aggression and full arm speed. “Lift your leg and let it rip… we’ll check finish AFTER the pitch.” Let the athlete know that any reduction in physical effort, arm speed, or simply thinking too much about the finish will mean that they are not ready to work on finish.
FREEZE @ #3 – Next, allow the athlete to throw without stopping and only a freeze at the finish position. Guide the athlete as he makes his own finish adjustments – always following the order of Point –> Click –> Shield –> Sword.
DC KEYS
- Anchor the Left Foot – On finish, the left foot can’t move – it can only twist so that the toes point to home plate. We are teaching that left/leg foot to land and plant firmly. Even if flying open or across body, leave that foot where it is and simply task the athlete to “point the toe to home plate.” **Moving the right foot back to a position across from left big toe also helps to teach the left leg to land and bear the body’s weight through release.
- Right Foot Up on Toe – Doing this “foot-up-on-toe” move shifts the weight over to the left leg (like “squishing the bug” but with the weight on the other foot). “Knee-in” means the hips have fired.
- Throw First, Check Finish Second – Adding the finish must NOT affect the athlete’s ability to throw aggressively. Challenge the athlete that instruction will only continue if finish position instruction doesn’t affect ability to let it rip.
CLOSING – Coaching pitchers requires a delicate balance of knowing when to add more and when to back off. There will be plenty of times when it is best to “bite your tongue.” Hold off on adding additional instruction, and allow the athlete to jog away from a session with a sense of accomplishment and incremental success. While you may see other flaws that need correct, trust the process and follow this coaching plan: Get through the balance point (#1) and the finish (#3). Coming next is the Power Position (#2).

EXECUTION KEYS
- REVIEW - FREEZE #1
- TEACH POSITION #3 - FINISH
- REPS - FREEZE #3
DC KEYS
- ANCHOR LEFT FOOT
- TRAIL LEG/FOOT UP ON TOE
- THROW FIRST, CHECK FINISH SECOND
EQUIPMENT LIST
 Pitching Rubbers1
 Baseball Buckets1
 Home Plate1
 Book1Purchase